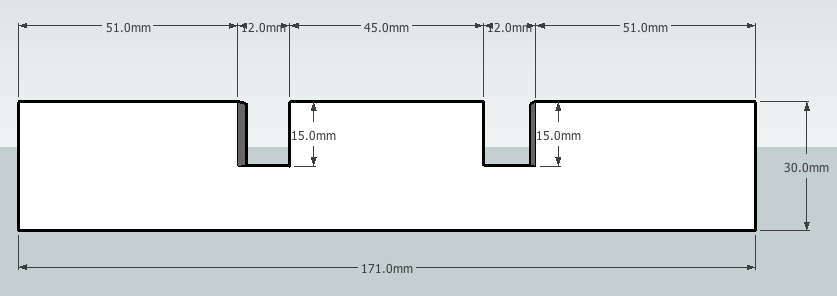
In week 2 of making our X's and O's box, we cut another four identical pieces of wood (171 millimetres long and 12 millimetres thick). You then make sure each piece fits in between each slot (try one, if it doesn't fit, try it in another) when you find a place that two can go horizontal and two vertical (it doesn't matter if the inserts are too big because you can sand it on a disk sander. Once you find a spot it fits, mark with different numbers on each four bits of wood and also mark matching numbers with the slot that it fits in but make sure you only mark it and one end because it might fit one way but not the other and you can then know if it is the right way or upside-down. Once you know this, you should put the two vertical ones half way in and the horizontal once half way it (because they don't inter lock together yet) and then mark (the width of the crossing wood) the bits where it is not allowing them join together (where the wood crosses each other). Next you should mark out all the way around the wood (so that it is all inline of where the cross section is). Then, with a marking gauge, mark out half in between the markings that you just made. The you cant cut and chisel that little section out. Make sure you do the vertical ones half way from the top and the horizontal ones half way from the bottom so that two are the opposite of the other.
Two should look like this...
But the other two the same but upside down.
When you put those wood pieces (shown above), you can now interlock them and put them in the previously made 'walls'.
You do this step by doing the following:
1.

2.

3.

You can then undo the three steps you just completed and then glue them (once again, don't worry about nails because the base will hold it together better.


Great work Alex, but you have probably gone into too much detail. The drawings/sketches are great.
ReplyDelete